
A Beginner's Guide to Huntsman
- Jonathan 'Etasus' Garretson

- Nov 23, 2025
- 17 min read
Updated: Nov 30, 2025
If you've clicked on this article for one reason or another, you are interested in learning about the basics of Arakni, Huntsman. Maybe you were sent this because you expressed a desire to learn the hero. Maybe you popped into the Spider's Web Assassin discord (Invite Link) and asked how to play the hero, and someone led you here. Maybe you're an enfranchised player who's just interested in seeing what there is to see.
However you made it here, welcome to the hero! It's a great place to be.
Part 1: Arakni's Hero Ability
The best way to start with Arakni is a very simple question with a very complicated answer: What is Arakni's hero ability?

Arakni's hero ability, on paper, is that whenever you play a contract, you get to peek at the top card of your opponent's deck and then choose to leave it on top or put it on the bottom. Contracts in general are attacks that ask you to banish specific cards to create silver, meaning the hero ability becomes useful for filtering the top card to enable that condition to be fulfilled.
We could spend entire novels talking about how to optimize this ability, but all of that work really only leads to marginal improvements in win rate. In general, a good heuristic to take is the following:
If you don't see a strong card on top, you should focus on silver generation. If the top card would create a silver token, leave it there. If it doesn't, put it on the bottom.
If you do see a strong card on top, you should focus on threat removal. If you think you can banish the card, leave it there. If you think you can't, or don't want to run the risk of not being able to, put it on the bottom.
In general, though, with how low impact this part of the ability is, it's not super critical to "get it right." Learn it, understand what to do with it, but don't put too much weight into it.
The important part of Huntsman's hero ability and where 90% of it's impact is localized is in a single card: Hunter or Hunted.
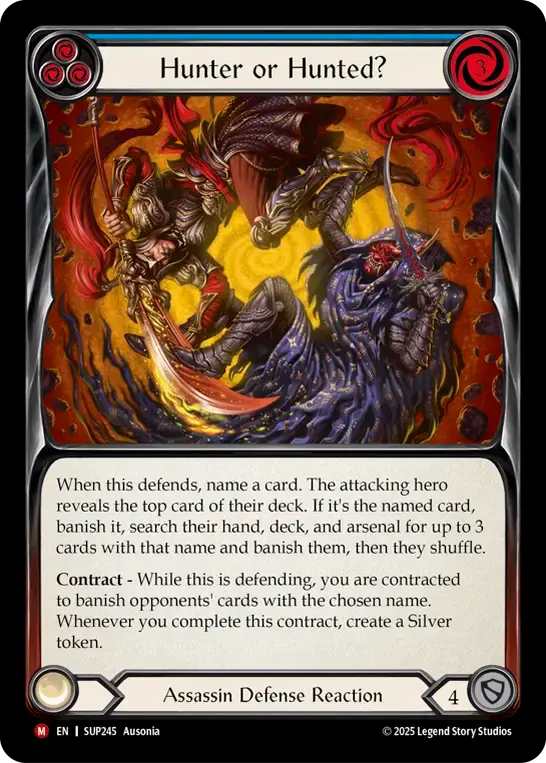
Hunter or Hunted is a card that asks you to name a card, reveal the top card of the opponent's deck, and then do a million things if you guessed correctly. For every other hero, this name is a guess. You have limited to no ways to know the top card and just have to hope. Huntsman, though, thanks to the ability to peek at the top card, allows you to know that card with certainty. Effectively, you can reword Arakni, Huntsman's hero ability to be "You can play Hunter or Hunted."
It is important to understand the timing windows on Hunter or Hunted. When you play Hunter or Hunted, Arakni's trigger goes on the stack before Hunter or Hunted resolves. This means you get to peek at the top card, and then your opponent has an additional priority window in the reaction step to play cards or activate abilities before Hunter or Hunted resolves. For 90% of the field, this window is useless, but a few heroes can readily and easily disrupt your ability. Dash I/O can play an item off the top (Play Hunter or Hunted on the last chain link or after she plays her item for the turn to avoid this), Gravy Bones can destroy a gold to loot, drawing the top card of their deck in the process (They activate it proactively most of the time, so just hold your Hunter or Hunted until after they activate their ability), Oscilio can discard an instant to draw a card (Play Hunter or Hunted when they have no more cards in hand to discard), and Cindra has both Ancestral Empowerment and Throw Dagger to draw at reaction speed (Play Hunter or Hunted on non-Ninja chain links to evade Ancestral and blindly hope they don't have Throw Dagger to punish. Your best bet is actually the first dagger chain link).
When you resolve a Hunter or Hunted, you effectively get to take the top card and then search the opponent's deck, hand, and arsenal for any other copies of it to banish. However many copies you find is how many silver you generate, with a max of 4 copies total.
The notable exclusion from these zones is the graveyard. As cards resolve to the grave, they stop becoming valid targets for Hunter or Hunted, meaning it becomes less effective the longer the game goes. In general, you should be playing Hunter or Hunted as soon as possible when you see it.
You can expect over the course of the game to generate between 6 and 8 silver tokens from all three copies of Hunter or Hunted. The average on a turn 0 resolution across the meta is 2.7 silver. If you had a perfect environment, that would be 8.1 silver throughout the course of the game, but due to the drop off as the game goes longer, you can expect it to be as low as 6.
Knowing this, you can reword Arakni, Huntsman's hero ability to be "Throughout the game, create 6-8 silver tokens."
So what do you do with silver?

There are 4 powerful cards in the game known as "buyback gear." They all generally follow the same mechanical verbiage: At the start of your turn, you can buy them back at the cost of two silver. You can then block with them for 1 and/or activate them for a small common rarity attack reaction effect. Graven Call is a tad unique as it has no inherent way to be destroyed, is a dagger instead of an equipment, and can be bought back at instant speed.
In the simplest explanation, Perdition gives you an extra banish, Shroud reduces the cost of a reaction card, Blacktek gives you on-hit go again, and Call is a single direct damage in conjunction with Flick Knives. You get to do all of the above once, and then any additional time costs two silver.
Knowing how much silver is generated by Hunter or Hunted, you can't buy back everything all the time. During deck construction, you effectively have to choose one or two pieces to focus your silver and game plan on.
There are generally two pairs of buyback gear agreed to be worth building around.
The first is Mask of Perdition and Graven Call. This is your tried-and-true variation of Arakni. You're playing fatigue, sustaining your life total, banishing cards, and dragging out a brutal endgame. Mask of Perdition lets you banish additional cards and dig through the deck faster, while Graven Call gets thrown once and becomes a 2-power life total clock.
The second is Redback Shroud and Graven Call. This is the newcomer on the field, vastly unexplored and brimming with potential. You're playing midrange, putting together incredibly high-value turn cycles and tempoing your opponent from 40 to 0. Redback Shroud lets you cheat out potent attack reactions like Spike with Bloodrot and Stains of Redback, while Graven Call sits as a secondary silver outlet to reduce life totals with true damage pings.
Blacktek Whisperers is a powerful card, but over-reliance on it can lead to a deck that unfortunately just doesn't hold up to the numbers of other Assassins or other Huntsman decks.
Throughout the rest of this guide, we will be discussing both Perdition lists and Shroud lists, allowing you to make your own decisions on the deck you choose to build and pilot.
All that to say, on paper, Arakni's hero ability is simple deck manipulation. But in practice, the hero ability allows you to run buyback gear and take full advantage of the equipment type.
Part 2: Building the deck
The deck itself is still relatively in flux. Hunter or Hunted was released only a few months ago, as of writing, and you can already see how important it is to the gameplay. What that means is that Huntsman is very open to interpretation. This is a hero where you can definitely flex your deckbuilding chops and come up with something interesting and exciting that matches you and your gameplay. That said, there are a few standard card selections for the hero.

The most common card in every single Huntsman deck is at least three copies of Double Trouble. Thanks to our high proficiency in running buyback equipment, it doesn't take much to find the two reactions needed to turn on Double Trouble. And when it is online, Double Trouble kind of does everything you need it to do. It has a 5/4/3 power statline for 0 resources and offers two deck banishes on hit. Fatigue likes it because it's a breakpoint attack that hits the deck faster and better than any other attack they have access to. Midrange likes it because it's a 0-cost 5 that can be completely turned online with a single activation of Redback Shroud.
How many Double Trouble you run is widely up for debate, with some lists only running 3 blue copies, and others running all 9 copies, but most lists generally land at 3 blue and 3 red. In order to support the blue copies, most lists are also running an amount of Just a Nick.
In general, the name of the game for Huntsman is efficiency. The inherent value of any individual card is often higher than the inherent value of individual cards from your opponent. Double Trouble is a one-card 5 + two deck banishes. Just a Nick turns the blues into a two-card 8 + three deck banishes. Buyback equipment helps power up all of these interactions even further, and most of these require low card count hands to play them out, allowing you to present extra cards on defense. So what are some other high-value cards that pop up in lists?

Plunder the Poor is a standard 0 for 4 contract, representing a banish and a silver. Assuming you create the silver, you are halfway to buying back an equipment piece, which has both a block and a reaction. The reaction can often be worth a ton depending on the situation, but as I don't believe in attributing exact numbers to gamestate-specific situations, we'll only focus on the block. This means that the silver is worth half a block, meaning Plunder the Poor is effectively a 0 for 4.5+. But what if you don't generate a silver? Well, that's the beauty of Plunder the Poor over other contracts.
Using early ProQuest Yokohama results, I created a spreadsheet known as the Banish Hit% sheet. I took a look at the top-placing deck of any hero worth more than 5% of the meta, and looked at how often a specific stealth or contract card would banish the relevant cards.
You can find the full data here: Banish Hit%
Thanks to Huntsman's hero ability, Plunder the Poor has an 82% hit chance into the overall meta, with a high end of 99% into Cindra and a low end of 24% into Kayo. You are more likely than not to banish a card with a cost of 1 or less utilizing Plunder the Poor, meaning you are more likely than not to generate a Silver. The next best non-M contract comes in with Annihilate the Armed at a 67% hit chance, which is a drop off of 19%. Because of how likely Plunder the Poor is to generate a silver, it is the only non-M contract that appears in every single Huntsman list.

Even Huntsman's blue base is focused on high-value individual cards. While looking at the available options at blue, contracts are relatively lackluster next to stealth's advantages. The difference between 1 and 2 is basically negligible, meaning the loss of power is easy to look past. Beyond that, running 1 power attacks allows Huntsman to play cards like Just a Nick and Looking for Scrap, the former of which is an incredibly important tool in Huntsman's arsenal, and the latter of which is a high-value extender that pops up in sideboards from time to time.
As far as life gain vs silver is concerned, stealths do miss the mark here. Silver is higher value than gaining life. That said, two stealth cards make up for that loss and then some. Bonds of Attraction will always gain a life, with next to zero chances to miss, while also coming built in with relevant disruption against Gravy Bones and Cindra. Art of Desire adds a card draw into the life gain, which can turn into a brutal attack that's incredibly risky to block out. Your opponent has to ask themselves whether they're willing to let you get a free arsenal or even utilize some go again to swing a second attack afterwards if they get particularly unlucky. Especially in an endgame situation, the card can become a backbreaking hit.

If you're willing to invest a pretty penny into this deck or have friends you can borrow the power pieces from, there are a couple of "staple" cards that Huntsman really wants.
Persuasive Prognosis takes everything said in the previous part about stealth blues and dials it to 11. Leave No Witnesses is like a Plunder the Poor that also hits the arsenal (Though there is an argument to be made that Plunder the Poor is stronger than Leave No Witnesses in certain situations. Leave No Witnesses is more likely to be blocked and less likely across the board to create a silver token. That said, Leave No Witnesses does threaten the arsenal, so there is that.)
Surgical Extraction and Command and Conquer come in as additional disruption to slow down fast decks.
Coercive Tendencies and Just a Nick create additional powerful spike turns.
Codex of Frailty is a complicated mess that in general kind of just reads "Really good card". As this is just a beginner's guide, I won't get too deep into the strength and playlines of these high-dollar cards, but it is worth noting their existence and strength.

Fatigue variations of Huntsman, which focus on Mask of Perdition, typically run more contract attacks. If you activate Mask of Perdition on a contract, the extra banish can generate additional silvers which can then be used to recur Mask of Perdition a few extra times. Utilizing the Banish Hit% sheet, you'll find the next best contracts in order are Annihilate the Armed and Slay the Scholars.
Additionally, with the high volume of contract cards, Cut to the Chase becomes a premium attack reaction that pushes those hits through, including the power hits of Leave No Witnesses and Surgical Extraction.
Lastly, due to being a defensive fatigue deck, these variations are running extra 0 for 4 defense reactions like Sink Below, Fate Foreseen, and Shelter the Storm if they're spending a pretty penny on the deck, all to push the block value of the deck just a little bit further.

Midrange variations of Huntsman, which focus on Redback Shroud, typically run more stealth attacks and stealth attack reactions. Mostly out of necessity, as Redback Shroud can only reduce attack reactions with a cost, which are almost exclusively attack reactions that target attacks with stealth.
The best stealth cards you can add to this list are Infect, Art of Desire, and Kiss of Death if you're spending a pretty penny on the deck.
To push those on hits, the deck is running 1-cost attack reactions, typically referred to as spikes. Spike with Bloodrot, Spike with Inertia, Spike with Frailty, and Stains of Redback are the go-to attack reactions to use.
Here are a couple of variations for each style of deck build:
For fatigue, here is Taylor Morrow's 2nd place finish at BH Sonoma, and Jacob Lanz deck featured in the Round 4 match of World Tour Philly
For midrange, here is my personal list, as well as Gothstana's decklist (There aren't any tournament lists in the archetype due to the slow adoption speed)
Part 3: Playing the deck As previously mentioned, Huntsman is a deck focused on individual card strength and fundamental gameplay. In general, your individual cards are of higher value than your opponents.
The best way to get better at fundamentals is, unfortunately, math. At the most basic level, draw a random hand of 4 cards. Go through every single playline presented in the cards, and determine the total threat presented. Then, start taking cards away. See what you can do with the hand if one card is missing, then see what you can do with the hand if two cards are missing. Figure out the optimal hand size, where you have the highest defense value with the highest threat value.
Now, threat value isn't always damage dealt, and defense isn't always damage prevented. Throwing a card to block can sometimes strip the opponent's ability to do things, such as a Mask of Momentum draw trigger or a Dawnblade's second hit, and sometimes presenting a card with a lower damage amount could be better due to the on-hit being presented, such as a Command and Conquer's arsenal disruption or a Double Trouble's deck banish.
It is worth noting that this kind of practice is something you can do with any hero and any deck. This is the best way to practice when playing solo, and should be done every time you put a new deck together. I personally will always draw a couple of hands and math out the lines every time I shuffle up a new deck.
So, let's talk Huntsman fundamentals specifically, because you can probably skip a few of those hands by going over some general heuristics.

In general, if a hand can present disruption, you should. Playing out a lone Persuasive Prognosis is almost always better than presenting a lone Plunder the Poor. Additionally, if a hand could present disruption under different circumstances but can't currently, it might be a good idea to hold onto the disruption elements for a later turn. For example, if you have a Leave No Witnesses in hand and your opponent has an empty arsenal, you should probably save the Leave No Witnesses in your arsenal for a later turn.
In general, when you play a card, you should bluff some form of reaction. Even if it's just a Plunder the Poor, you should be holding onto a card to threaten a Cut to the Chase. Persuasive Prognosis with a card in hand, threatening Just a Nick, is a lot scarier than a Persuasive Prognosis with nothing. This also means that you should have a good grasp of your reactions and where they are. If all three Just a Nicks are in your graveyard, there's no point bluffing that you're holding onto it. Some cards that help you ease into this play pattern of bluffing include Sigil of Solace, which can just turn into life in the reaction step, or Coercive Tendencies, which you can use to generate value even when your opponent overblocks.
In general, even in the midrange variants of Huntsman, you should focus on threat preservation. Depending on archetype and matchup, you don't always need to worry about pitch stacking, but even just a simple decision to keep threats in your deck is worth a ton. Bonds of Attraction is a wonderful blue with a ton of powerful interactions, but Surgical Extraction is often just a better card. If you have 3 damage swinging at you in a way that you need to block, and you're mathing out the cards you're going to block with and the cards you're going to pitch, you should probably block with the Bonds so that you can pitch the Surgical for later in the game.
In general, equipment reactions are meant to be used. That said, you should be smart with when you use them. Double Trouble needs reactions to play out, so even if you have two silver to buy back your Graven Call that's ready to be thrown, you should probably wait to activate your Flick Knives until you've got a Double Trouble on the active chain link waiting for your reactions. Additionally, your Mask of Perdition could be amazing on the Leave No Witnesses you're about to play, but you have a Plunder the Poor that's been stuck in arsenal, and you know Plunder is more likely to generate a silver than the Leave No Witnesses, so maybe hold onto your Mask reaction until you get the chance to play the Plunder the Poor.
In general, you are playing a fair game. Your opponent is not. If you can cheat, do it. This does not mean cheating in the sense of sleight of hand, manipulating your deck as you shuffle it, but more in the sense of finding broken interactions where you can to get the upper hand. For fatigue, this could mean using your tunic to allow you to pitch a blue into dagger -> codex -> cnc. For midrange, this could mean sticking a Mask of Perdition reaction on your Kiss of Death so that when you flick it on top of the contract attack on the next chain link, you can generate a silver off of the banished card.
Now, with universal advice out of the way, let's move on to archetype-specific advice, starting with fatigue.

If you are actively trying to fatigue, you need to put a sticker over your opponent's life total. It's irrelevant. What matters to you is your life total and both players' deck size. The math you should be running is not "damage threatened" but "cards threatened". For example, take a hand with two blues and Plunder the Poor. You could block with the two blues and play out Plunder the Poor. This playline loses three cards from circulation, as all three end up in your graveyard. Consider, instead, using your two blues to pitch into both daggers and swing a Plunder the Poor at the end. Yes, 3 block is turning into 1 damage, but now you're only losing one card from circulation, as both blues are remaining in your deck. Obviously, you need to pay attention to what your opponent is doing, and maybe you need to block, but this kind of math is what you should be doing. Every hand, try and figure out the number of cards your opponent is losing and the number of cards you are losing. As the fatigue deck, if you are losing cards at a faster rate than your opponent, you are losing the matchup.
While fatiguing, focus on actively putting threats on the bottom of your deck. Using the example above, you could actually replace one of those blues with a red, thanks to the cost of your daggers. Or, you could use the Sink Below to put a Leave No Witnesses on the bottom of your deck without the opponent knowing about it.
If you're playing to fatigue, the number one thing that can lose you the game is very simple: Being greedy. It may be hard to, but just because you see a hand with 3 zero-cost banish attacks and a Coercive Tendencies does not mean you need to say no blocks and play all of them out. Just because you have two Cut to the Chase next to a Leave No Witnesses doesn't mean you should play both on the same chain link. And it gets even worse when you start factoring in equipment reactions. Just because you activate Blacktek Whisperers does not mean the attack is going to hit with go again. Even if you react to push the attack over the edge, they might have a reaction of their own to block you out. In general, before taking a game action or setting up a gameplay sequence, ask yourself what the worst-case scenario is. If the worst-case scenario is bad enough, find a different line to play.

If you are playing midrange, you always need to have a threat to present. There is always a chance that you might draw a hand with just attack reactions. If this happens at the wrong turn, you can basically just shuffle up for the next game, as losing the tempo can be game-defining. To limit your ability to just draw a brick and lose, you should always focus on arsenaling a stealth card. If you have a hand with two stealth cards, put one in the arsenal for later.
Being greedy in midrange is different than being greedy in fatigue, but it's still something that should be avoided at all costs. Yes, you should be presenting powerful turns and maxing out your damage values, but you can't let the aggro deck walk all over you to do it. Your four-card hands are going to be less valuable than your opponents' four-card hands. You should mostly be focused on lines with 2-3 cards so that you can hold onto something to block or arsenal for later.
Activating Redback Shroud is not an excuse to play more cards, but an excuse to block more proactively. If you don't have a Shroud to activate because you've already used it, or you haven't generated enough silver to warrant freely activating it without care, hold onto an extra blue to swing a dagger into the stealth chain link, leaving you a resource left over that you would have cheated out with Shroud. To put it another way, when you have a ton of silver sitting around and a Redback ready to activate on every stealth react you see, you should take the blue cards that you would have been using to pitch for the reactions, and you should block with them instead.
Part 4: What to do next

All of this is really just a guide, not a step-by-step instruction manual. Your next goal should really be self-driven. Decide which variation you want to play, fatigue or midrange, and then start picking up cards and building the deck, improving as you go.
Which variation of the deck you choose is really up to you, but keep this matchup spread in mind:
Fatigue is really good against aggro, decent against fatigue, and loses against midrange.
Midrange is really good against midrange, decent against aggro, and loses to fatigue.
Both generally are not great against board state.
A general buying order should look like this:
Start by picking up a playset of common and rare assassin cards. Focus on the cards mentioned in this article. Red contracts, blue stealths, spikes, defense reactions, and so on. For your first higher rarity pick up, you should get your hands on either a Mask of Perdition and/or a Redback Shroud. Then, grab a Flick Knives and a Graven Call. You can get away with Starting Point until you find a copy of Blacktek Whisperers.
Before you play your first game, you will also need to pick up a playset of Hunter or Hunted, as the deck is relatively nonfunctional without it.
As you play, though, start picking up disruptive pieces like Persuasive Prognosis, Surgical Extraction, and Leave No Witnesses. You should also pick up your playset of Just a Nick relatively early, as well as your playset of Coercive Tendencies.
As you start optimizing the deck further, grab a playset of Codex of Frailty, a playset of Command and Conquer, and your copy of Fyendal's Spring Tunic.
The most important piece of advice I can give is this: don't be silent. The Arakni community is one of the most welcoming and helpful communities in the game. If you have any questions, hop into the purple Discord Arakni chat or the Spider's Web Discord and ask any questions you may have. We want to see you succeed, so come hang out and learn the deck. If you want to join the Spider's Web Discord, there's a link on the Blackjacks Tavern homepage and one at the bottom of this page.


